Is your Xbox One controller’s left joystick causing problems? You’re not the only one facing this. Joystick drift is a common issue that affects many gamers. It can really spoil your fun. This DIY guide is here to help you fix that problem yourself, without needing to pay for repairs. We’ll show you how to solve the issue, using easy steps.
A surprising fact: 71% of the fixes we’ll talk about don’t need you to open up your controller. This means you can try to sort the problem without taking anything apart. For those ready to dive in, we’ve got a list of 13 steps for a full Xbox One controller repair. These steps are not too hard to follow.
We didn’t forget about keeping your controller in good shape to avoid future problems. Our guide has tips on this, to help you keep your controller working well for as long as possible. By the end of this guide, you’ll know exactly what to do to keep your controller in top condition.
Understanding the Issue with the Left Joystick
The left joystick on an Xbox One controller is key for playing games. It lets players move and control what they’re doing. When it starts to malfunction, it’s important to know what’s going wrong. Controller drift is when the joystick moves on its own, not good for gaming.
Joystick problems often come from wear and tear. Things like thumbstick pads and springs can wear out. A good clean with isopropyl alcohol can help fix it at first. If that doesn’t work, you might need new parts.
Sticky buttons can also be annoying. Cleaning them with rubbing alcohol usually does the trick. Keeping your controller in good shape is vital. You should recalibrate it and update its software regularly.
Fixing a left joystick needs patience and some tech know-how. Sometimes, you might have to re-solder parts to get them working right. This doesn’t require expert skills. Knowing these basics helps gamers keep their controllers going longer.
Common Symptoms of a Faulty Left Joystick
Spotting joystick symptoms early leads to quicker fixes and a better gaming feel. Players often notice the joystick moves oddly, like making moves by itself. It might drift away even when you’re not touching it. These Xbox controller malfunction signs disrupt your game, especially when every second counts.
Sometimes, the joystick won’t react as it should. It may not go as far as it’s supposed to in any direction. This can really affect your game. Also, there are times when it seems fixed after moving it, but then it acts up again. Catching these issues early helps solve them quicker.
Drift issues are a hot topic online, but it’s vital to know other problems exist too. The word ‘drift’ gets lots of attention, but your problem might be different. If you need more info on joystick problems, check out these resources.
Initial Troubleshooting Steps
When your Xbox One controller’s left joystick acts up, start with simple troubleshooting steps. Battery check is your first move. This simple action can fix the issue without needing more steps.
Checking Battery Levels
A controller’s responsiveness may suffer from low battery. Always check if your controller has enough power. Replace or recharge the batteries as needed.
Restarting the Controller
Restarting your controller might just do the trick. Hold the Xbox button for around 10 seconds. Then turn it back on and see if the joystick works better.
Resyncing the Controller
If issues are still there, try resyncing your Xbox controller with your console. This can fix connection and communication problems. Follow your console’s settings for how to do this right.
Gathering Necessary Tools for Repair
Before you start fixing your Xbox One controller, you need the right tools. Picking the correct tools makes the job easier and safer. This part will tell you the essential items you need. It also covers important safety tips.
Essential Tools You Will Need
You’ll need these tools to fix your controller:
Torx screwdriver (T8 or T9) for opening the controller casing
Super glue for reinforcing loose components
Isopropyl alcohol for cleaning the thumbstick and circuit board
Soft cloth to avoid scratches during cleaning
Non-static tweezers for handling small parts
Safety Precautions to Consider
Safety is very important when fixing your controller. Here are some tips to stay safe:
Always turn off the controller before starting the repair
Use safety goggles to protect your eyes when working with small electronic parts
Work in a well-lit area to avoid misplacing components
Keep your workspace organised to prevent losing tools or parts
Step-by-Step Guide: How to Fix Left Joystick on Xbox One Controller
Learning to fix your joystick can help you solve problems by yourself. This guide makes it easy to repair your Xbox joystick. You’ll save money and make your gaming better.
First, clean the joystick. Wipe it with a cloth dipped in isopropyl alcohol to get rid of dirt. This dirt often causes the joystick to move on its own. Always handle your controller with clean hands to keep it clean.
Next, inspect the controller for visible signs of wear. Use compressed air to clean hard-to-reach spots. This will get rid of dust inside the controller.
To open the controller, you need a Torx screwdriver. It helps you take out screws without damaging your controller. Remember where each piece goes to put it back together easily.
Below is a table that shows the ten main steps for fixing your joystick:
Step
Description
1
Check the warranty status of the controller to see if repairs can be covered.
2
Clean the exterior of the joystick with a cloth soaked in isopropyl alcohol.
3
Use compressed air to clear out any debris within the joystick area.
4
Unscrew the back cover of the controller using a Torx screwdriver.
5
Carefully remove and set aside components to gain access to the joystick module.
6
Inspect the joystick module for loose parts or misalignments.
7
Adjust dead zones using software settings if necessary.
8
Reassemble the controller carefully, ensuring all parts fit correctly.
9
Test the joystick functionality before sealing the back cover.
10
Finalise reassembly and enjoy your repaired controller.
Each step mentioned is crucial for the controller’s performance. Be careful with every part, and keep everything clean. This guide will not only fix your joystick but also help it last longer.
Dismantling the Controller Safely
Dismantling your Xbox controller safely is key for repair work. You should follow the right steps to avoid damage. This guidance will show you how to remove batteries and cables. Then, how to take off the back cover and access the circuit board.
Removing Batteries and Cables
First, make sure the controller is off. Open the battery compartment to take out the batteries. Unplug any cables with care. These actions are crucial for a safe disassembly. They help prevent short-circuiting any parts.
Removing the Back Cover
Then, gently pry off the back cover with a suitable tool. Be careful not to snap the clips. Removing the cover lets you see inside and gets you ready for the next steps.
Accessing the Main Circuit Board
Now, the main circuit board should be visible. Unscrew and gently remove any components to lift it out. This part needs careful handling to avoid any damage. Doing these steps correctly helps fix joystick problems.
Identifying the Problem with the Thumbstick Module
Carefully looking at the thumbstick module is key when fixing joystick problems. It’s important to spot the grey plastic piece. This part is critical for keeping the joystick’s movement steady. Knowing about this piece helps greatly in fixing and figuring out joystick issues.
Locating the Grey Plastic Piece
The grey plastic piece is vital for the joystick to work right. It makes sure the joystick moves precisely. To find this part, slowly move the joystick. Watch how it connects to the module. If this piece isn’t in place or looks broken, it could be why the joystick isn’t working well.
Examining for Loose Components
Finding any loose parts in the module is crucial. Loose parts can make the joystick act up. First, check the screws and joints you can see. If something feels shaky, it needs a closer look. Spotting these issues early can make fixing the joystick easier and cheaper.
Repair Techniques for the Joystick Module
Fixing a joystick, especially the thumbstick module, requires knowing the best repair techniques. Using super glue correctly can make damaged parts strong again. It’s important to avoid common mistakes to make the fix last longer.
Using Super Glue for Reinforcement
Super glue helps strengthen the grey plastic inside the joystick module. Applying super glue fixes cracks and makes it tougher. If you understand joystick repair methods, remember to:
Clean surfaces well before gluing to get a strong bond.
Only use a tiny bit of glue to avoid messes that could hinder movement.
Give the glue enough time to set fully, ensuring the repair holds.
What to Avoid During the Repair Process
Avoiding mistakes is key to a successful repair. Knowing good controller repair tips helps avoid annoyance. Make sure not to:
Apply too much glue, as it could jam the joystick or cause it to stop working.
Rush taking things apart. Being too quick might damage sensitive parts.
Forget to check if everything works at each step; missing this might mean having to redo work.
For those needing more help, Scot-Comp’s services are a great choice for tough joystick problems.
Repair Techniques
Key Considerations
Super Glue Application
Use little glue, clean the parts first, allow the glue to cure completely.
Common Mistakes
Using too much glue, hurried disassembly, not testing as you go.
Reassembling the Controller
After fixing it, it’s time to put the controller back together. Make sure every part inside is clean and free of dust. This makes sure the joystick works right and avoids more problems later.
Steps to Ensure a Secure Fit
Follow these steps to put it back correctly:
Carefully put the joystick module back in the controller.
Tighten all screws and parts so nothing’s loose and causes issues.
Check the soldered spots again to make sure everything’s connected right.
It’s important to fix the joystick well to stop it from moving wrongly later. This makes sure your fix lasts.
Testing Before Final Assembly
Testing the controller before sealing it is key. Turn it on and go through the menus. Make sure all joysticks move right. If they drift or don’t respond, you might need to fix something else.
Doing a full check tells you if you need to adjust something. For more help with repairs, see this guide on fixing stick drift on Xbox One.
Post-Repair Maintenance Tips
After you fix your Xbox One controller, it’s important to keep it in good shape. Controller maintenance tips help avoid issues like joystick drift. By cleaning the joystick regularly, you can make your controller last longer.
Cleaning the Joysticks
It’s essential to keep your joystick clean. Dust and dirt buildup can cause problems. Clean it with isopropyl alcohol and a soft cloth. Be gentle around the joysticks and their area. Make sure not to let too much moisture get inside.
Regular Maintenance for Longevity
Regular checks are key to keeping your controller working well. Take it apart now and then to clean out dust. Make sure nothing’s loose, and fix it if it is. Keep your console cool and in a spot with good air flow. This stops overheating and keeps it running smoothly.
For tricky problems, consider getting help from professionals. Scot-Comp offers services to ensure your controller stays in top shape. This is a smart move for serious issues.
Maintenance Task
Frequency
Details
Joystick Cleaning
Monthly
Use isopropyl alcohol and a lint-free cloth
Dust Removal
Every 3 months
Disassemble to access internal components
Console Care
Ongoing
Keep in a ventilated area, avoid overheating
Conclusion
This guide has clearly shown how to fix joystick drift on Xbox One controllers. By knowing the usual causes, like old thumbstick pads or springs, users can find and fix problems. A good first step to fix drift issues is cleaning the thumbstick pads. For tougher issues, you might need to replace the springs or the whole thumbstick unit. It’s important to know how your device works.
DIY repairs save money and empower gamers. They learn how to make their controllers last longer. It’s crucial to regularly maintain and clean your controller. This can stop big problems from happening later. If you’re thinking of fixing your controller yourself, this guide aims to boost your confidence. It also tells you when it might be better to get professional help.
Taking care of your controller can prevent joystick drift and make your gaming better. Whether you fix it yourself or get help, knowing more about your Xbox controller keeps it working well. Come back to this guide if you ever have joystick issues again. It will help you keep enjoying your gaming gear.
FAQ
How can I fix the left joystick on my Xbox One controller?
Begin by figuring out what’s wrong, like stick drift or it not responding. Look up a DIY guide for help. It should have steps, tools needed, and how to fix it. This usually means taking the controller apart and then putting it back together safely.
What causes joystick issues in the Xbox One controller?
Joystick problems often come from normal use over time. This can lead to stick drift, random movements, or it not centering properly. Knowing why it happens is key to fixing it.
What tools do I need to perform a joystick repair?
You’ll need a Torx screwdriver, super glue, and Isopropyl alcohol for the repair. Don’t forget safety goggles to protect your eyes during the process.
How do I know if my joystick needs immediate attention?
Look out for unusual movements, commands happening on their own, or it not centering. Spotting these early can save your controller from more damage.
What are effective troubleshooting steps before starting the repair?
First, check the battery levels and restart the controller with the Xbox button. Then try resyncing it with the console. These might fix minor issues without needing repairs.
What safety precautions should I take while repairing my controller?
Make sure your controller is off before you start. Always wear safety goggles to keep your eyes safe from small parts.
How do I safely dismantle my Xbox One controller?
Remove batteries and cables first. Then gently take off the back to get to the main board. Use the right tools to avoid breaking anything.
What should I look for when examining the joystick module?
Check if the grey plastic piece is stable and look for anything loose. This tells you if a simple fix will do or if it needs more work.
How can I ensure a successful repair after reassembling the controller?
Test the joystick before putting everything back together. Make sure everything fits well during reassembly to avoid future problems.
What maintenance can I perform after repairing my joystick?
Clean the joysticks regularly with Isopropyl alcohol and take it apart now and then to dust it. This helps your Xbox controller last longer.
Many Xbox Series X users face unexpected shutdowns during intense gaming. This issue is particularly common while playing Warzone. These power problems can disrupt your gaming experience and hint at hardware issues. Xbox Series X power failures have become a hot topic on Reddit. Users report consoles shutting down within minutes of gameplay. This raises…
Xbox controller drift is a widespread issue affecting gamers globally. It occurs when analog sticks move without player input. This problem disrupts gameplay and frustrates users12. About 70% of Xbox Series X users face this issue. Most gaming controllers start to malfunction within 1 to 2 years of use12. Wear and tear causes half of…
Voice chat is key in Xbox gaming, letting players talk easily during games. But, a broken Xbox mic can spoil the fun. People often have problems with their mics, from bad sound to no sound in Xbox party chat. This guide will help you fix your mic for better gaming chats. Headset issues are common…
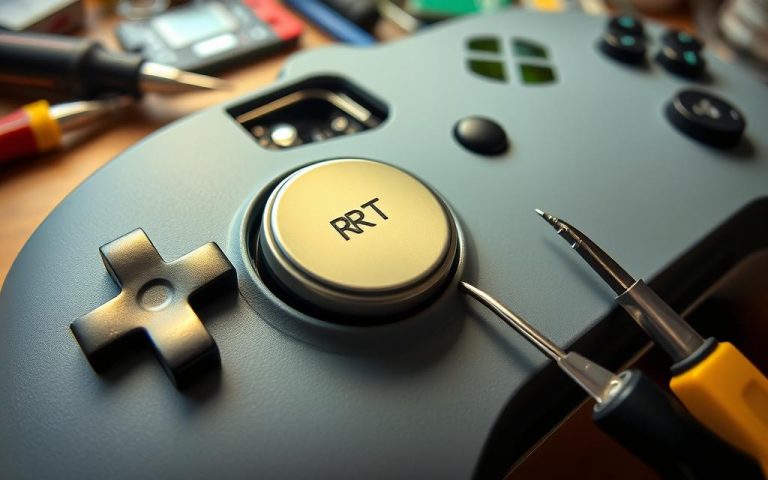
A faulty Xbox controller can ruin your gaming experience. This guide will help you fix RT button issues on your Xbox controller. We’ll use professional techniques to get you back in the game quickly. RT button problems are common among gamers. They can cause unresponsive triggers or unexpected input. Professional repair techniques can restore your…
Slow Xbox issues can ruin your gaming fun. About 60% of Xbox One users face this problem. It’s often due to storage limits and network issues. This guide will help you solve common Xbox performance problems. We’ll cover laggy gameplay, long loading times, and slow downloads. You’ll learn how to boost your gaming experience. Several…
Xbox 360 connection issues can ruin your gaming fun. This guide offers strategies to solve persistent connection problems1. Let’s dive into fixing your Xbox 360 and get you back to gaming. Network problems often interrupt online gameplay. Error code 8015190E is a common sign of connection failure1. Fixing these issues requires careful testing and specific…