Welcome to your step-by-step guide on fixing an iPhone 11 screen. In our world today, having a working smartphone is a must. A damaged iPhone 11 screen can be very stressful. But many people can fix their iPhone 11 screen by themselves without needing to go to a pro. This guide will show you everything you need to know, from the right tools to detailed steps to replace the iPhone screen yourself. By following these instructions, you can get your phone back to normal. Plus, you’ll save a lot of money that you would have spent on professional repairs.
Introduction to iPhone 11 Screen Repair
Starting a screen replacement journey needs an understanding of a few key points. Many think OLED screens and tough glass need a pro to fix. But, this idea stops people from trying to fix their iPhones themselves.
The iPhone is designed for easy screen replacements. Fixing your device yourself is rewarding and saves money. DIY repairs give you control and help save cash.
Before fixing your iPhone, you need to know some basics. First, make sure the battery is less than 25% full to avoid accidents. Then, take out the 6.7 mm-long screws to open the screen.
It’s crucial to have the right tools for the job. For instance, a Y000 screwdriver is needed for some screws. Always wear safety glasses to protect your eyes from broken glass.
Professional screen repairs can be expensive, starting at $69.99. Many choose the DIY path for personal screen fixes. This approach saves money and deepens your knowledge of how your iPhone works.
Understanding iPhone Screen Damages
Many iPhone users often deal with screen damage like cracks or shattered glass. These issues can come from dropping the phone or bumping it into something. Even though the iPhone screen is made from strong aluminosilicate glass, it’s still thin and can break easily.
Screen problems can also appear in other forms. You might see dead pixels, image retention, or burn-in on OLED displays. Sometimes, the screen may have discoloration, lines, or might not respond to touch because of digitiser damage. This part is essential as it turns your touch into actions on the phone.
OLED and TFT LCD displays can show the same damage signs, frustrating users. Fixing these issues isn’t simple. It often involves taking apart many components. For example, fixing an iPhone 11 screen means removing many tiny screws and using tools like suction cups.
Dealing with any iPhone display issue needs careful handling. It’s crucial to ensure the new screen is installed properly. Knowing about these issues helps in diagnosing and fixing your phone. Whether you choose professional help or a DIY approach, the right knowledge is key.
If you’re interested in learning more about fixing screens, look into MacBook Pro screen repairs. It can give you more insight into complex repairs. For more information, check out repair options for a deeper look at screen repairs.
How to Fix an iPhone 11 Screen: Preparing for Repair
Getting ready to fix an iPhone 11 screen? First, focus on gathering the right tools. Having all needed equipment makes the repair go smoothly.
Gathering Necessary Tools
For a successful iPhone screen fix, you’ll need these tools:
Pentalobe screwdriver
Y000 screwdriver
Suction cups
Opening picks
Plastic spudgers
Magnetic mat for screws
With these tools at hand, taking apart and reassembling your device will be easier. This leads to a better repair outcome.
Ensuring Safety Before You Start
Safety is key when fixing an iPhone. Always turn your device off before you begin. Make sure the battery level is under 25% to reduce fire risks.
If your screen is already broken, put tape over it to avoid glass shards. It’s also a good idea to book a Genius Bar appointment if you want professional help.
Proper preparation keeps you safe and helps achieve a good repair result for your iPhone 11.
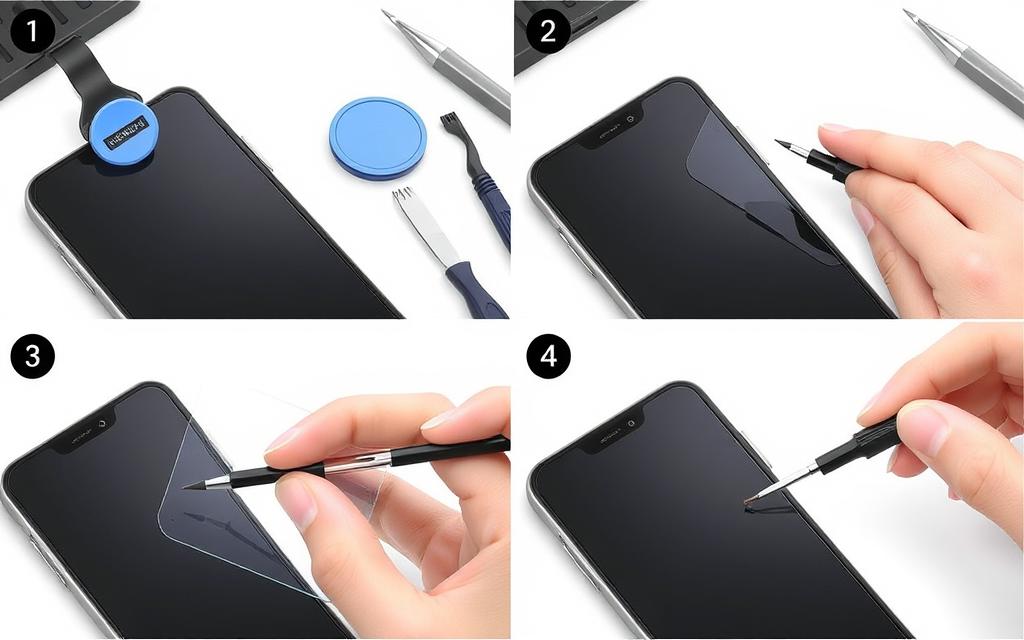
Step-by-Step Guide to Opening Your iPhone 11
To open an iPhone 11, you need to follow specific steps. This ensures you fix the screen without harming your device. Make sure to carefully follow the steps we provide for a safe and effective disassembly.
Powering Off and Discharging the Battery
First, switch off your iPhone 11. Also, make sure its battery is below 25%. This is to lower the risk of fire or explosion if the battery is accidentally damaged. These precautions help make the repair process safer.
Removing the Pentalobe Screws
Then, move on to the two pentalobe screws at the phone’s bottom edge. It’s very important to use the right screwdriver here. When unscrewing, remember where each screw comes from. Precision matters a lot in taking apart the iPhone 11.
Creating an Opening Gap
For an opening gap, you can use a suction cup or an opening pick. Soften the adhesive by heating the bottom edge. This makes it easier to open. Mark 3 mm from the opening pick’s tip with a permanent marker to prevent damage.
Be very careful not to harm the fragile cables on the right side of the iPhone 11. Safety glasses will protect your eyes from any glass shards. Tools like the Anti-Clamp can help with this tricky part.
For more help on each step, check out this repair guide. It provides detailed instructions for replacing a broken screen effectively.
Disconnecting Components for Screen Removal
To replace an iPhone 11 screen without harm, you must carefully disconnect parts. It is vital to methodically unhook key components. These include the battery connector, logic board cover, and display connectors. This ensures safety and keeps the phone working when taking the screen off.
Accessing the Battery Connector
Firstly, lower the battery power to 25% to reduce handling risks. Then, use a Pentalobe screwdriver to get rid of the two 6.7 mm screws at the device’s bottom edge. Gently lift the display to see the battery connector, held by three 1.1 mm screws. Removing these screws needs precision for a safe component disconnection.
Removing the Logic Board Cover
After the battery is disconnected, focus on the logic board cover. You must unscrew five 1.1 mm screws to remove it. Taking off the logic board cover gives easy access to the phone’s inside. Tweezers help remove small brackets from connectors, like the ambient light sensor, which is vital for the phone’s proper work.
Disconnecting the Display Connectors
Once you can reach the logic board, carefully disconnect the display connectors. Treating these connectors gently prevents damage. Remove any sticky residue or old tape to ease disconnection. Securely reconnect any loose connectors from drops to avoid a black screen or flickering issues.
Knowing these steps is key to dodge common screen replacement problems. This structured method keeps your iPhone 11 functional and all parts safe.
Replacing the Damaged Screen
After you take off the broken display, it’s key to put in the new screen assembly. Make sure the new screen is properly aligned. Get all the connectors working right. Doing this correctly will help your iPhone 11’s display last longer.
Installing the New Screen Assembly
Start by lining up the new screen on your iPhone 11 carefully. Check that every edge is matched up. Press down softly so the adhesive sticks well. Paying close attention here is very important. Not doing it right can cause problems later. Once the new screen is in, repair costs start at around $139. This usually includes both parts and the service, making sure your display is replaced properly.
Reconnecting All Components
Now reconnect everything you took apart. This includes display and battery connectors. Make each connection tight to stop any issues. Repairs typically take under an hour. This means you’ll be back on your device quickly. For expert help, go to an authorized service provider. They offer top-notch service with a 1-year limited warranty. They have over 700 places with skilled teams. Your iPhone 11 is in safe hands.
Service
Details
Price
Screen Repair
Starting fee for iPhone 11
$139
Repair Time
Most repairs completed in 1 hour or less
N/A
Warranty
1-year limited warranty on screen repair
N/A
Locations
Over 700 service locations
N/A
Diagnostics
Free diagnostics for issues
N/A
Testing Your iPhone After Repair
After fixing the screen, it’s key to test iPhone after repair. This makes sure everything works right. Doing a detailed iPhone functionality check spots any leftover problems from fixing it.
Here are vital areas to test:
Touch Sensitivity: Gently swipe and tap all over the screen. It should react right away without any delay.
Display Brightness: Try changing the brightness. Make sure the screen looks good in any light.
Screen Responsiveness: Try using multi-touch gestures like pinch-to-zoom and swipes. They should all work smoothly.
Colour Accuracy: Look at different colours and shades. Check if they all look correct without any fading.
Physical Integrity: Check the screen’s edges for any gaps or odd looks. This helps see if it was put in right.
Test these areas well for the best performance of your device. If you find problems, fix them fast to avoid more issues.
Tips for Maintaining Your iPhone’s Display
Looking after your iPhone’s screen is key to making it last longer. Keeping the screen safe helps its look and work well. By cleaning it often and using it carefully, you can avoid more harm.
Here are some tips for looking after your repaired iPhone screen:
Use a 70 percent isopropyl alcohol wipe, 75 percent ethyl alcohol wipe, or Clorox Disinfecting Wipes for gentle cleaning.
Stay away from things like window cleaners and harsh substances. They could harm the screen’s special coating.
To keep Touch ID working well, wipe the Home button with something soft and clean.
Keep your phone dry and away from water to avoid damage.
When cleaning near the SIM tray, be careful with alcohol wipes.
Avoid getting things like ink, dyes, food, oils, and lotions on your display. They can cause stains. Stay clear of salt water, soaps, or detergents as they’re not good for your screen.
iPhone works best in certain temperatures – from 32° to 95° F (0° to 35° C). Keep it within this range for great performance. Too much heat or cold can damage it and cause problems.
Looking after your iPhone screen is important. It keeps the display bright and responsive for a good user experience.
Conclusion
Fixing an iPhone 11 screen yourself is both doable and useful. This article has given you clear steps to follow. It also shows why it’s vital to know how damaged your screen is before you start. With the correct tools and some patience, you can make your device work well again. This improves how you use your phone.
DIY screen repair saves money because of affordable, quality repair kits. Brands like iFixit and Helpertech offer great parts with warranties. Fixing your phone yourself is not just about saving money. It also feels good to fix your own phone and make it work better.
When repairing your iPhone 11, it’s important to pay attention and use the best kits. If you’re not sure or need help, professional services like Scot-Comp are there for you. They offer an iPhone 11 repair summary for those who need it. With what you’ve learned, you can approach your repair job with confidence and the right resources.
FAQ
What tools do I need for an iPhone 11 screen repair?
You’ll need pentalobe and Y000 screwdrivers, suction cups, and opening picks for the repair. Don’t forget safety glasses to protect your eyes from glass shards. Make sure you have these tools ready before you start.
Is it safe to repair my iPhone 11 screen myself?
Repairing your iPhone 11 screen on your own is safe if you follow the correct steps. Make sure the battery is below 25% and wear safety glasses for protection. The iPhone’s design helps make self-repairs easier.
What types of screen damage can occur with the iPhone 11?
The iPhone 11 screen can crack, show a flickering display, or not respond due to digitiser damage. Knowing these problems helps you fix your screen better.
How do I know if my iPhone 11 screen needs replacing?
Your iPhone 11 screen might need replacing if there are visible cracks or if the touch or display flickers. Testing your phone can help confirm these issues.
What precautions should I take before starting the repair?
First, make sure your device is off and discharge the battery to below 25%. Always wear safety glasses. Tape over any cracks to stop glass shards from spreading.
How do I test my iPhone after repairing the screen?
Once the screen is repaired, test your iPhone. Check the touch sensitivity, the brightness of the display, and if the touchscreen responds well. This ensures your phone is ready for use again.
Can I prevent future screen damage on my iPhone 11?
To avoid future damage, use a screen protector and keep your iPhone away from extreme temperatures. Also, be careful where you place your device to prevent accidents.
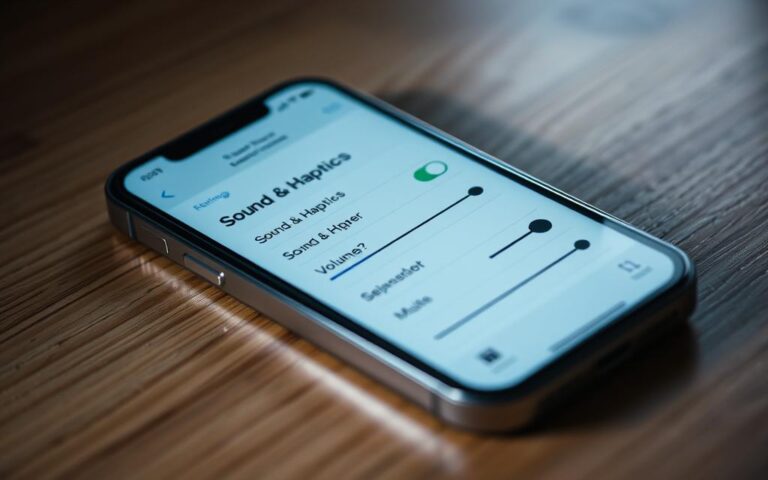
Many iPhone users, especially those with iPhone 14 Pro and iPhone 15 Pro, face a weird issue. They get notifications visually but no sound. This problem often arises even when the settings are right, pointing to issues like software bugs or Bluetooth troubles. About 86% of users have faced notification sound challenges, showing it’s a…
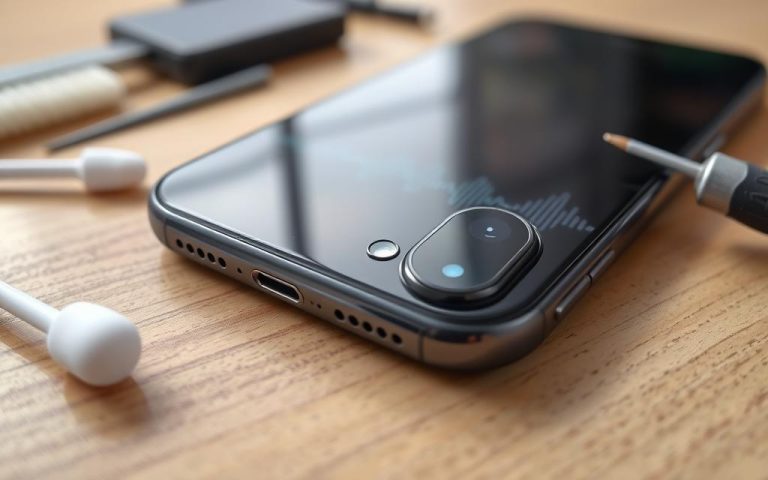
Recent iOS updates have caused earpiece sound issues for many iPhone users. These problems affect various models, frustrating those who rely on their devices for communication. Software glitches in iOS versions 16.0.02 and 17.x are behind these widespread challenges. Users report sound issues that make phone calls difficult. The causes of these problems can be…
Dead pixels on your iPhone XR can be quite vexing. About 1 in 1000 iPhone users face this rare screen issue. Knowing how to tackle these display flaws is vital for your device’s visual quality. Dead pixels are tiny screen defects appearing as unresponsive black or white spots. They can stem from manufacturing faults or…
A cracked iPhone 6 screen can be a headache. Luckily, there are budget-friendly repair options available. These solutions can help you fix your device without emptying your wallet. Screen damage is common among smartphone users. iPhone 6 owners have several choices for affordable iPhone repair. These options can mend a cracked screen without costing a…
Today, worries about malware on our devices are high, even for iPhone users who usually have strong security. Even though finding viruses on iPhones and iPads doesn’t happen often, they can still get adware, spyware, and Trojans. This guide tells you how to deal with a virus on your iPhone, showing you how to spot…
Screen damage on your Samsung S9 can be vexing. Luckily, professional repair solutions are easy to find. Understanding your options can help you save time and money. Samsung offers various repair paths for Galaxy S9 screen replacement. Professional technicians can fix different types of screen damage. Out-of-warranty repairs cost between £219 and £229. The repair…