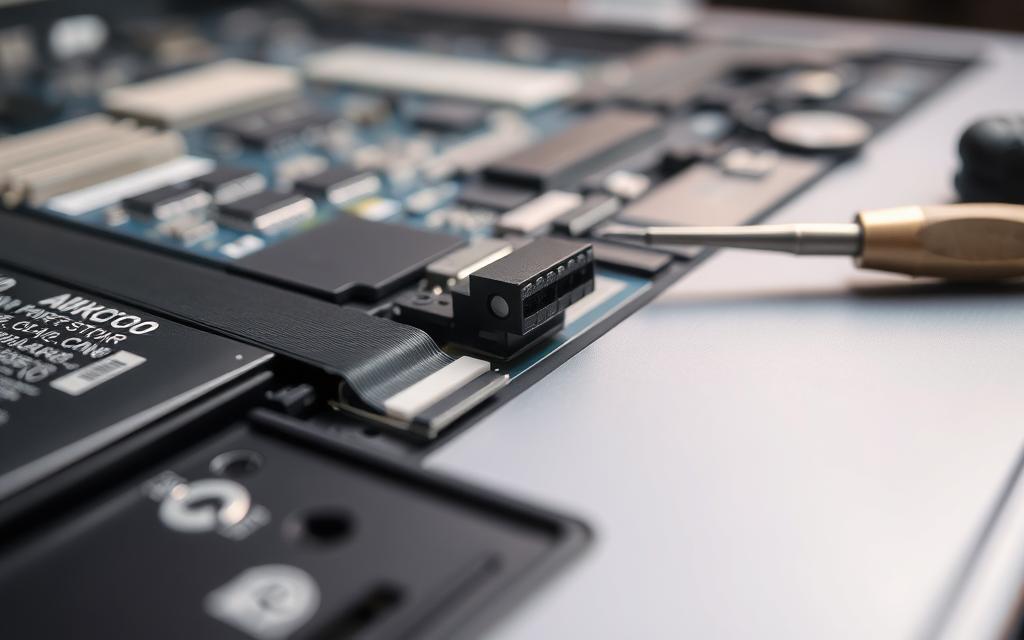
Fixing a laptop yourself can sometimes involve the power button ribbon cable. This thin cable links the power button to the laptop’s motherboard. It’s often involved in issues like those seen with the Compaq Presario CQ50, where it might not work properly. In our laptop repair guide, we will explore the typical issues with these cables, the tools you’ll need, and step-by-step instructions for a successful repair. See the image to know what you’re dealing with. Understanding these parts can simplify your device and save you money on repairs.
Understanding the Role of the Power Button Ribbon Cable
The power button ribbon cable is key in a laptop’s function. It connects the power button to the motherboard. This lets you turn the laptop on and off. Problems with this connection can mean big troubles, like the laptop not turning on.
It’s crucial to know how the power button ribbon cable works. If it fails, the laptop won’t get power. This can stop you from doing your daily tasks.
This ribbon cable importance leads to many types, with different numbers of conductors. They are usually made from stranded copper wire. This makes them strong and reliable. These cables are not just in laptops but in many devices across industries.
Common Issues with Laptop Power Button Ribbon Cables
Finding out the usual problems with laptop power button ribbon cables can save lots of time and effort in repairs. One common issue is the cable coming loose from the motherboard. It needs a close look to fix. Another problem is when the copper prongs on the cable do not line up properly at the power button end. This makes us wonder if the cable is still good.
Bending or mishandling can damage these cables. Such damage makes the situation worse, like tearing. When dealing with these cables, it’s important to be careful. This avoids more issues. A common problem is when the cable disconnects at the motherboard. The black part of the cable might stay stuck in its white connector. This can stop the laptop from working, which is very annoying.
Sometimes, people try unusual fixes, like using tin foil to act as the power button. Although this might make the tin foil warm, it usually doesn’t turn the laptop on. These attempts show that it’s hard to tell if the laptop’s battery is simply dead. Or if it just needs to be plugged in.
It’s crucial to stay safe while trying to fix these problems. Even though laptops run on low voltage, risky methods like the tin foil trick can be dangerous if the laptop is plugged in. Knowing exactly what’s wrong, as with the Compaq Presario CQ50, is key. This knowledge helps fix the laptop well and quickly.
Tools Required for the Repair
Having the correct tools is vital for fixing a laptop power button ribbon cable. Using the right laptop repair tools ensures accuracy and safety. Below is a list of key repair equipment needed for this repair, with their uses:
Scissors: Perfect for cutting the ribbon cable to size or fixing frayed edges.
Soldering Iron: Necessary for connecting the ribbon cable or fixing broken contacts.
Solder Paste: Helps make connections strong and dependable.
Single Edge Razor Blade: Good for removing insulation carefully without causing damage.
Masking Tape: Keeps parts in place temporarily during repair.
Flat-Blade Screwdrivers: Used to take off the laptop’s back panel and other parts.
Using these tools for fixing ribbon cables makes the repair smoother and reduces the chance of damaging the laptop. Each tool listed is important for a safe and successful repair. This way, the laptop can work well again.
Tool
Purpose
Scissors
Trimming ribbon cables
Soldering Iron
Connecting broken contacts
Solder Paste
Facilitating strong connections
Single Edge Razor Blade
Removing insulation
Masking Tape
Securing components
Flat-Blade Screwdrivers
Accessing internal components
Having the right essential repair equipment makes laptop repairs easier and more likely to succeed. It improves the chances of fixing the power button properly.
Step-by-Step Guide on How to Fix Laptop Power Button Ribbon Cable
Fixing a laptop power button ribbon cable starts with a careful check and prep. This bit talks about key laptop repair steps. It helps you spot the damage before starting with DIY ribbon cable repair. It’s important to check well so you tackle the real problems with fixing ribbon cables.
Assessing the Damage
First, take a good look at the ribbon cable and connections. Check for:
Frayed or exposed wires
Loose or broken connectors
Visible kinks or folds
Write down any issues you find. This information is key in guiding your laptop repair steps. A good diagnosis is essential for a successful DIY ribbon cable repair.
Gathering Necessary Tools
Before you start the fix, gather the right tools listed below. Having these makes the repair smoother:
Tool
Purpose
Screwdriver set
To remove the laptop casing
Soldering iron
For reattaching cable connections, if needed
Multimeter
To check continuity and electrical flow
Adhesive
To keep any loose connections in place during fixing ribbon cables
Wire strippers
To prepare any damaged wire sections
Having all the right tools ready helps a lot in your DIY ribbon cable repair. A well-set workspace is great for doing repairs well.
Preparation for Repair
Before fixing a power button cable, it’s important to be ready. Safety for you and the laptop is key. By following proper safety steps, you reduce risks with electronics. Start by making sure the area you’ll work in is tidy and organised. This makes repairing easier and safer.
Safety Precautions
It’s critical to use the right safety measures during repairs. Here are important tips:
Work in a well-ventilated area to avoid breathing in any fumes.
Use an anti-static mat to keep the internal parts safe from static damage.
Make sure the laptop is off and unplugged to prevent electric shocks.
Wear safety equipment like gloves and goggles to avoid injuries.
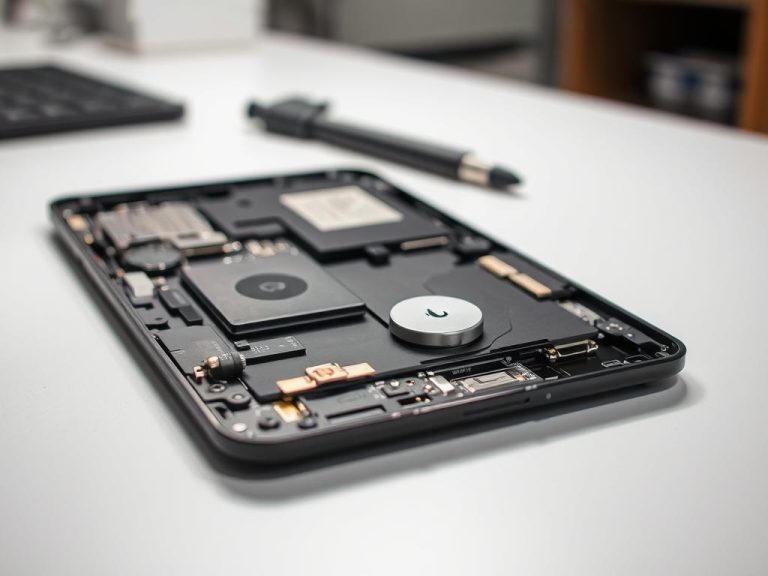
Removing the Laptop’s Back Panel
To open the laptop safely, follow these steps. Different models might require different methods, but here’s a general idea:
Prepare your tools, like a screwdriver set and plastic prying tools.
Find the screws on the back panel. You’ll usually need to remove several.
Remove two small covers in the middle-back. They hide screws.
Remember, some covers, like the four round ones, should stay put.
With all screws out, use the plastic tools to gently open the back. This avoids scratches.
Check for any damage or issues once the panel is off.
If you find the layout too complicated, getting professional help is wise. For expert repairs, visit trusted MacBook repair services in Edinburgh. There, skilled technicians can solve various laptop problems.
Repair Techniques for Ribbon Cables
Fixing ribbon cables needs careful precision. If you’re looking to fix connections, knowing how to repair ribbon cables is crucial. This process might include gluing contacts back together. It also involves securing the ribbon cable ends. These steps are vital for devices like laptops and gaming consoles to work well.
Gluing Back Detached Contacts
When dealing with laptop power cables, it’s important to quickly fix any detached contacts. Apply a tiny bit of super glue where the contact has come loose. Be careful to use just enough glue. Too much can mess with the cable’s function. Hold the glued spot until it’s totally set. This creates a strong bond that helps restore the connection.
Securing Ribbon Cable Ends
It’s also key to secure the ends of ribbon cables properly. This might be done in different ways, depending on the connector used. For example, using ZIF connectors can be very helpful. They don’t need much force to connect the cable. Make sure the ribbon cable’s marked line is lined up with the connector’s edge. This ensures a good connection.
In devices like laptops, press down the ends carefully. A bad fit can cause connectivity problems. Such problems could affect the device’s ability to function correctly.
Knowing about different connectors helps in making effective repairs. Learning the right steps and methods is key. This ensures your repairs last, keeping your electronic devices working.
Connector Type
Repair Technique
Notes
ZIF Connectors
Align and press down
Requires minimal force
Standard Ribbon
Gluing and taping
Common for internal connections
Pop-Style Connectors
Pry straight up
Ensure no breakage occurs
Coaxial Connectors
Lifting straight up
Metal head connection
Flat-Topped Connectors
Careful positioning
Check for proper fit
Display/Cam Cable Connectors
Unclip before removal
Important to avoid damage
Alternatives if Repair is Not Possible
Sometimes, damage to a ribbon cable is too severe to fix. Knowing when to replace is key in these cases. If a cable is damaged beyond repair or shows too much wear, getting a new ribbon cable is the smarter, more cost-saving move over time.
When to Consider Replacement
Knowing when it’s time to get a new cable is important. Keep an eye out for:
Visible damage like fraying or breaks in the cable.
Frequent connectivity problems.
Continuous failure despite repair attempts.
Choosing a new ribbon cable is often the best answer in these scenarios. Talking to experts for a correct diagnosis and advice is a good step. It’s wise to seek out services that provide full support, like data recovery and expert repairs, for a complete solution.
Purchasing New Ribbon Cables
Quality is vital when buying new cables for your laptop. Here are some tips to pick the right one:
Choose cables from trusted brands that match your laptop.
Look at customer feedback to check the cable’s quality.
Shop around to get the best price without losing out on quality.
By following these guidelines, you can make replacing your ribbon cable smoother and improve your laptop’s performance. Avoiding cheap parts helps your device work better and last longer. Always do your research before buying essential parts like this.
Tips and Tricks for a Successful Repair
Being successful in laptop repairs takes careful work and knowing common mistakes. Following the right steps can make a hard task easier. Here are key tips to help you fix laptops successfully.
Using Acetone Safely
Acetone is great for cleaning glue off ribbon cables safely. Use just a bit on a cotton swab and only on spots that need it. This way, you avoid damaging the cable with too much acetone. Always work in a well-ventilated area to keep from breathing in fumes.
Avoiding Common Mistakes
Avoid these frequent errors to ensure a good repair job:
Be gentle with ribbon cables to avoid breaking them.
Always double-check connections before you finish the repair. Missing this step could cause problems later.
Don’t just focus on a faulty cable; check the whole laptop to find the issue.
Ignoring the manufacturer’s instructions can lead to mistakes. It’s important to have the right guide with you.
Troubleshooting After Repair
Once you’ve fixed the laptop’s power button, it’s critical to test it carefully to make sure it works. Effective troubleshooting after laptop repairs means checking connections and making sure all parts work right. Look at how the laptop behaves when you press the power button. This shows if the repair was done correctly.
Testing Power Button Functionality
First, put the laptop back together and plug it in. Then do a full check to find any possible problems. Below are important steps for testing:
Make sure the laptop is plugged into a working AC adapter.
Hit the power button and see if the laptop turns on or not.
If the laptop starts, test it a few times to ensure it’s stable.
Also, looking at BIOS settings may reveal more complex issues. Watch how the laptop starts, shuts down, and wakes from sleep. If issues keep up, checking the battery, DC jack, or RAM might be needed.
Conclusion
Fixing a laptop’s power button cable might seem tough. But, with the right know-how and tools, it’s doable by yourself. This guide highlights the importance of knowing about the power button cable. It covers finding common issues and the need for the correct tools.
Using the tips from this article, you can boost your tech skills and feel proud. When fixing laptop cables, you may run into problems like soldering or making sure the connections work. But, if you follow the advice and use tricks like hot glue for extra hold, you’re more likely to succeed.
The joy of fixing it yourself is huge. Taking the DIY route lets you not just repair your gadget, but also learn more about electronics. As you start fixing things on your own, keep in mind that every step teaches you more about tech.
FAQ
What symptoms indicate an issue with my laptop power button ribbon cable?
If your laptop won’t turn on or has power troubles, the ribbon cable might be the cause. This happens when the cable is disconnected, damaged, or old.
Can I repair the power button ribbon cable myself?
Yes, you can fix it yourself if you have the right tools and know a bit about laptops. Just be careful and follow the steps closely.
What tools do I need for fixing a power button ribbon cable?
You’ll need scissors, a soldering iron, solder paste, a razor blade, tape, and screwdrivers. Each tool helps in fixing the cable safely and correctly.
How do I identify damage to the ribbon cable?
Check the cable for breaks, fraying, or loose ends. Look for signs of bending or wear too. This helps find problems that need fixing.
What precautions should I take before starting the repair?
Work in a space with good air, ground yourself, and use an anti-static mat. These steps keep your laptop safe from static damage during the fix.
How can I securely attach the ends of the ribbon cable?
Use a bit of super glue to attach any loose contacts. Make sure not to use too much glue. Let the glue dry properly before you put the laptop back together.
When should I consider replacing rather than repairing my ribbon cable?
If the cable is really damaged, like torn badly or worn out, get a new one. Make sure to buy from reliable sellers to get a good cable.
What are some common mistakes to avoid during repairs?
Don’t use too much force, forget to double-check connections, or hurry the fix. These mistakes can cause more problems.
How do I test if the repair was successful?
After fixing, put your laptop back together and try to turn it on. Watch for any odd signs. How the power button and laptop start will show if the fix worked.
ASUS laptops are essential for work and study nowadays. So, a black screen can cause a lot of stress. This guide will help you find and fix the problem, focusing on the most effective solutions. About 25% of these problems are due to power supply issues. Hardware failures, such as issues with the motherboard or…
A frozen laptop cursor can quickly disrupt your workflow and cause frustration. It can turn a productive session into a stressful experience. About 10% of computer users face this issue monthly1. Understanding the causes of a stuck mouse pointer is crucial. Software issues account for 60% of frozen cursor incidents. These include incompatible apps and…
Laptop keyboard issues can be quite annoying. About 40% of problems come from software glitches. A broken key on your Dell laptop doesn’t always need a full keyboard swap. Most keyboard failures are due to physical damage or spills. These often need specific hardware fixes. Regular upkeep can prevent many potential problems. This guide will…
Power button issues plague 15% of Android tablet owners. These problems can seriously hamper your device’s daily use. Fixing them is crucial for maintaining your tablet’s functionality. About 70% of smartphone users have faced power button malfunctions. These issues range from minor annoyances to complete device unresponsiveness. Understanding these problems is key to keeping your…
DNS issues can disrupt your online experience, blocking websites and slowing down browsing. This guide will help you tackle DNS problems on your laptop effectively. About 25% of users face DNS-related difficulties yearly. Learning practical troubleshooting skills is vital for maintaining smooth network connectivity. Our guide offers step-by-step instructions to fix DNS problems on your…
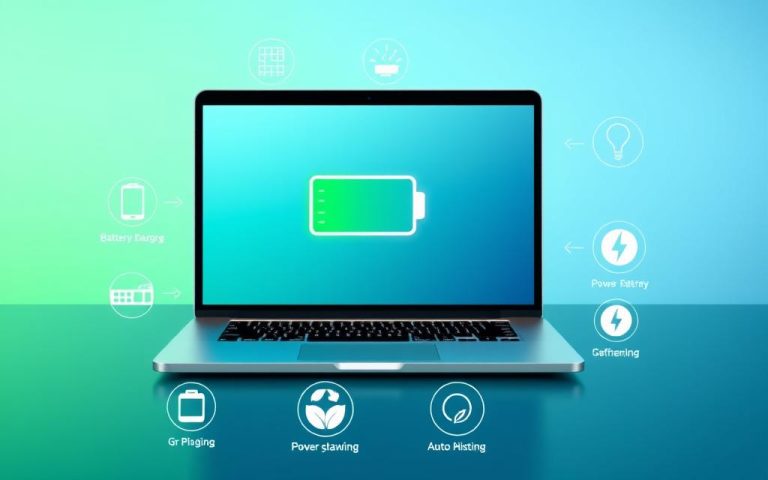
Modern laptops can run for up to 10 hours on a single charge. Proper power management and smart usage can extend your device’s battery life. Optimising your battery habits can boost your laptop’s performance significantly. Lithium-ion batteries in laptops can handle about 500 full charge cycles. Users can maximise battery potential by using energy-saving techniques….