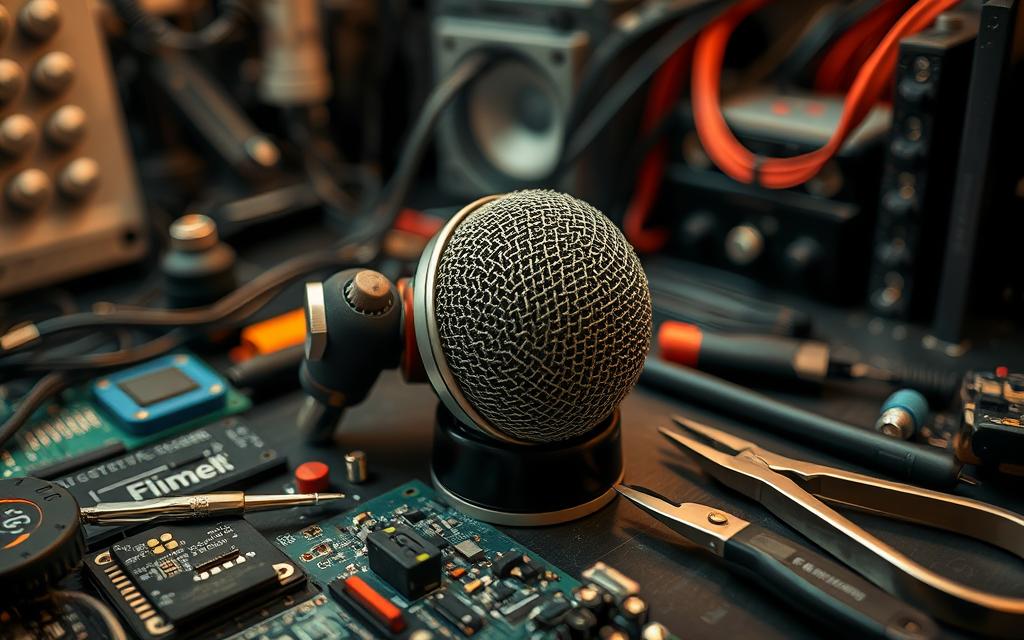
In today’s world, a working computer microphone is key. It’s needed for clear talks during video calls and online gatherings. This guide will show you how to fix your microphone and set it up right. This way, you can solve common issues many face. Every year, professionals fix thousands of laptops, highlighting the importance of knowing how to sort out microphone problems.
Knowing how to solve microphone problems is crucial. Simple steps like restarting your laptop or updating Windows can sometimes fix it. If problems continue, getting help from specialists like iFixScreens is a smart move.
Sometimes, the solution is checking if everything’s plugged in correctly or if the mic is clean. This guide gives you easy and complex ways to ensure your microphone works well. This will improve how you sound to others online.
Understanding Common Microphone Issues
Microphones can have problems for many reasons, impacting how they work and sound. Knowing the usual reasons for these issues helps greatly. It makes fixing them faster. Being aware of these troubles means you can fix them quickly, not missing easy fixes.
Why Microphones Fail to Function
Microphones stop working for a few reasons, such as:
Being muted in settings, leading to confusion during calls or recordings.
Driver issues such as outdated or missing drivers that impede microphone performance.
Hardware damage, which can occur from drops, spills, or constant wear and tear.
Connectivity problems with plugs or ports that prevent proper audio transmission.
Dust accumulation in the microphone mesh, particularly relevant for smartphones and tablets.
Figuring out what’s wrong means checking connections and settings. This is true for devices using Windows 10, 8, and 7. It also applies to gadgets made by Lenovo and HP.
Knowing the signs of a broken microphone is key for quick fixes. Common signs include:
No sound during talks or recording sessions.
Bad sound quality, like distortion or cuts.
Being undetectable by the computer, which can be annoying.
Weird buzzing or feedback sounds that ruin clarity.
If you notice these signs, try running a sound troubleshooter or check the mic’s physical connection. If these steps don’t work, it might be time to get help from a pro. This could stop the problem from getting worse. For instance, Scot-Comp offers repair services for HDMI issues, showing that expert help can make things better.
Initial Troubleshooting Steps
Starting with easy troubleshooting steps often solves microphone problems quickly. Users sometimes miss easy things like checking if it’s muted or properly plugged in. These steps are key in sorting out microphone issues.
Check if the Microphone is Muted
Being muted is a common cause for microphone problems. A study showed 58% of issues on BigMarker were fixed just by checking this. Make sure your microphone is unmuted in both the software and on the device itself. Checking the sound settings in the Control Panel can confirm this.
Restart Your Computer
Software glitches can mess with your microphone. Restarting your computer is an easy yet powerful way to fix these problems. This action refreshes the system and can clear up any minor errors that affect the microphone.
Inspect Physical Connections
Checking your hardware is vital. 15% of microphone problems come from connection issues. Make sure all wires and connectors are secure and not damaged. Loose or faulty connections can stop your microphone from working right, leading to annoying user experiences.
How to Fix My Microphone on My Computer
Having trouble with your microphone? Check the Control Panel settings first. Make sure the right permissions are set. This helps apps use the microphone properly. We’ll show you how to fix common issues easily.
Ensure Correct Microphone Settings in Control Panel
To sort the settings, head to the Control Panel. Here’s a step-by-step guide:
Open the Control Panel and go to Sound settings.
Hit the Recording tab to see your microphones.
Pick the microphone you want to use. Make it the default.
Right-click it and select Properties for more options.
Make sure it’s not on mute by checking the levels.
Verify Microphone Access Permissions
In Windows 10 or newer, checking app permissions is key. This ensures your microphone works with different apps. Follow these steps:
Head to Settings, then click on Privacy.
Look for the Microphone section.
Switch on Allow apps to access your microphone.
Go through the apps list. Turn on access where needed.
These easy steps help you fix and check your microphone’s settings. Updated drivers and secure connections also improve performance.
Testing Your Microphone
It’s vital to check your microphone for top-quality audio. This applies whether you’re using your device’s built-in mic or an external one. Testing can spotlight any problems. This way, you can fix issues before they disrupt your calls or recordings.
How to Test Built-in Microphone
To test a built-in microphone on Windows, go to the sound settings. You’ll see if the microphone captures sound by watching the audio levels. Here’s how:
Right-click the sound icon in the system tray and choose “Sounds”.
Go to the “Recording” tab and find your built-in microphone. Talk into it and watch for green bars that show sound is being detected.
If there’s no response, ensure your microphone is connected and enabled.
This test gives you quick feedback on your mic. You can make adjustments if needed, especially before important video calls.
Using External Microphones for Diagnosis
When built-in mics fail, try an external microphone. It can show if the issue is with the mic or your system’s settings. Follow these steps:
Plug in a working external microphone.
Follow any instructions to install necessary drivers.
Do the test steps again, as with built-in mics.
This method helps pinpoint the problem. Whether it’s the hardware or setup error, testing on different systems like Android, macOS, or Windows is wise. For a detailed check, look at resources that focus on microphone testing.
Microphone Quality
Automatic Gain Control
Noise Suppression
Good
Enabled
Enabled
Fair
Disabled
Enabled
Poor
Enabled
Disabled
User feedback often points out the need for functional microphones. This affects how clear you sound in meetings. If you’re having mic troubles, look at microphone diagnosis solutions for more help and advice.
Configuring Audio Settings on Windows
For the best microphone performance, it’s important to set up your audio settings in Windows correctly. You can easily manage default microphone settings and adjust audio preferences in the Control Panel. This helps you improve sound quality and how your microphone works.
Set Default Microphone through Control Panel
Selecting your main microphone is a vital first step. You start this process in the Control Panel’s Sound settings. The Sound page clearly separates sound output and input settings. This makes it simple to adjust your microphone settings. Here’s how to choose your default microphone:
Open the Control Panel and select Sound.
In the Recording tab, find the list of microphones connected to your system.
Choose the microphone you want to use and press the Set Default button.
Click OK to save your settings.
Adjust Microphone Levels and Boost
Once you’ve set your default microphone, focus on adjusting its levels. Go to the Recording tab and click on your microphone’s properties. There, you’ll find different settings you can change:
Levels: Control your microphone’s master volume and balance settings.
Boost: Turn on microphone boost to make your audio input louder and clearer.
Troubleshoot: Quick-fix common microphone problems using the troubleshooting feature.
Adjusting your audio settings can make a big difference. If you’re not happy with the adjustments, there’s a reset option. It lets you go back to the default settings recommended by Microsoft. With these changes, your microphone will work its best, ensuring clear and dependable sound.
Updating Microphone Drivers
Keeping your audio drivers up to date is crucial for your microphone’s performance. It ensures your microphone works well with your system. This also stops problems caused by outdated drivers.
Manually Update Your Audio Drivers
To update your microphone driver manually, first go to the Device Manager. This lets you manage all your computer’s drivers. Here’s how to update:
Right-click on the Start Menu and pick Device Manager.
Open the Audio inputs and outputs section.
Right-click on your microphone and select Update driver.
Choose Search automatically for updated driver software.
This method is key for Windows 7, Windows 10, and Windows 11 users. It keeps your audio gear, from brands like Realtek and Intel, working smoothly.
Check for Driver Conflicts
Driver conflicts can stop your microphone from working right. Knowing these conflicts is important for keeping things running smoothly. Look out for these signs:
Your microphone isn’t seen by the system.
Sound problems happen after updating Windows.
The quality of audio input isn’t consistent.
If these issues come up, you might need to fix or reinstall the drivers causing trouble. Tools like Driver Easy can help find and solve these conflicts automatically. For those who want fast and reliable updates, Avast Driver Updater is a great choice. It updates audio drivers with just one click.
Advanced Microphone Configuration
Adjusting your microphone’s advanced settings can really improve how it sounds. These tweaks are key for Bluetooth mics, making sure they deliver clear audio reliably. We’ll cover turning off exclusive control settings and how to fine-tune your Bluetooth microphone.
Disable Exclusive Control Options
Some apps might try to control your microphone all by themselves. This can mess with your sound quality. By turning off these exclusive controls, you avoid these issues and let multiple apps use the microphone without any problem. Follow these steps to make the changes:
Go to the Control Panel on your Windows machine.
Click on Sound, then head to the Recording tab.
Right-click on your microphone, choosing Properties.
In the Advanced tab, untick the Allow applications to take exclusive control of this device option.
Hit Apply and then OK to save what you’ve done.
Making these advanced tweaks can fix lots of common sound problems. It helps your microphone work better overall.
Adjusting Bluetooth Microphone Settings
If you use Bluetooth, setting it up right is essential. The next steps will help ensure your Bluetooth mic works its best:
Make sure the Bluetooth mic is charged and close to your computer.
Update the Bluetooth driver via the Device Manager.
In Sound settings, set your Bluetooth mic as the default.
Run the Windows Troubleshooter to find any hardware problems.
Try your mic with different devices to check for issues with ports or malfunction. For step-by-step setup and troubleshooting, check out this detailed guide.
Troubleshooting Hardware Failures
It’s important to identify and solve hardware failures to fix a microphone. A step-by-step method helps find the root cause. These can be physical damage or issues inside the microphone. Doing a detailed check helps solve microphone issues quickly.
Diagnosing Physical Damage to the Microphone
Physical damage often leads to microphone problems. When inspecting, look for signs such as:
Loose connections: Make sure all connectors are tight. Loose connections can interrupt sound.
Broken wires: Check cables for any damage like fraying or cuts. Damaged cables can cause sound loss.
Faulty jacks: Inspect the microphone jack for wear or damage. Bad jacks can affect performance.
Dirty components: Dust or moisture can block sound. Cleaning parts improves sound quality.
Assessing Internal Wiring Issues
Internal wiring problems can also affect audio. During your check, look out for:
Cable integrity: Check that wires inside the microphone are in good shape and secure.
Testing methods: A multimeter can help find issues like breaks or shorts in cables.
Replacement consideration: If wiring is damaged, replacing it may be needed to fix the microphone.
Advice for Special Cases
Sometimes, when using a microphone with headphones, you might run into issues. This happens because the two devices can interfere with each other. Recognising the challenges with headphones can make things better. It improves both your experience and the sound quality.
Issues with Headphones and Microphones
Headphones and microphones can clash. Here’s what often goes wrong:
Incorrect default settings: Your headphone might not be set up right, or the audio input might be off.
Physical connection issues: If cables aren’t plugged in correctly or if connectors are damaged, there will be problems.
Input device recognition: Sometimes, your device doesn’t switch audio sources well, disrupting the sound.
To fix these issues, double-check that everything’s plugged in properly. Also, adjust your sound settings (Settings > System > Sound).
Unique Fixes for Specific Brands (e.g., Lenovo, HP)
Some brands like Lenovo and HP have their own set of microphone problems. But, there are specific fixes for these issues:
Brand
Common Issue
Solution
Lenovo
Microphone not detected
Go to the device manager, look at audio inputs, and make sure your microphone is on.
HP
Low audio levels
Change the microphone gain in the Control Panel to solve this.
Asus
Audio feedback issues
Turn off sound enhancements in settings and see if it gets better.
Addressing these specific problems properly can greatly improve how your headphones work. Often, the special steps for each brand help a lot with their unique issues.
Conclusion
This guide has shown you how to fix common microphone problems on Windows 10. It covered checking cables and settings, updating drivers, and more. These steps are crucial for getting your microphone to work well again. Also, looking after your privacy settings and sound levels can better your audio experience and stop future issues.
We’ve outlined ways to identify and solve microphone issues step by step. Whether it’s setting app permissions or using the Windows troubleshooter, these actions are key. Also, tools like Fortect can make this process smoother and boost your system’s stability.
By following these tips, you can quickly fix microphone troubles and keep your audio and communication clear. Keeping your drivers updated and checking your hardware regularly helps too. For more help, check the full guide here.
FAQ
What are the common signs that my computer microphone is not working?
Some signs that your microphone is not working include no sound during calls. You might also notice poor audio quality. Another issue is the microphone not showing up for the operating system.
How can I check if my microphone is muted?
To see if your microphone is muted, right-click on the sound icon in the taskbar. Then, select ‘Sound settings.’ Look under the ‘Input’ section to make sure the microphone is not muted.
What should I do if my microphone isn’t recognised by my computer?
If your computer doesn’t recognise your microphone, restart your computer first. Check the connections are all good. Also, make sure the correct microphone is active in the Control Panel settings.
How do I know if my audio drivers are up to date?
To see if your audio drivers are current, go to ‘Device Manager.’ Click on ‘Sound, video and game controllers.’ Right-click your audio device. Check if any updates are available.
What are the steps to set my default microphone in Windows?
To set a default microphone, open ‘Control Panel.’ Click on ‘Sound’ and go to the ‘Recording’ tab. Right-click the microphone you want and select ‘Set as Default Device.’
How can I test if my built-in microphone is functioning properly?
You can test your microphone through ‘Sound settings’ in Windows. Select your microphone and talk. See if the sound levels move.
What advanced settings can I configure for my Bluetooth microphone?
For Bluetooth microphones, sometimes you need to disable exclusive control. Find this option in the microphone’s properties under ‘Control Panel.’ This helps your microphone work better.
How do I identify hardware issues with my microphone?
To find hardware problems, first inspect your microphone for damage. Then, check the wiring inside. You might need a professional’s help or replace it if there are issues.
Are there specific fixes for brand-specific microphone issues?
Yes, brands like Lenovo and HP might have special fixes for microphone issues. It’s best to look at brand-specific support or forums for help.
Random computer shutdowns can ruin a productive work session. These sudden interruptions disrupt workflow and risk data loss. Understanding the causes of system instability is vital for effective troubleshooting. Modern computers face many issues that can trigger random shutdowns. Hardware faults and software conflicts can appear without warning. Finding the exact cause requires a systematic…
Computer repair technicians are vital in maintaining and fixing technical issues in the digital world. They specialise in diagnosing and repairing computer systems. These experts keep organisations and individuals connected and productive1. Twelve percent of technicians excel in troubleshooting skills. They are crucial guardians of our technological infrastructure1. These professionals work across various tech domains….
Having no sound on your computer is annoying. It messes with work and fun. Fixing this is key to getting back on track. This guide gives you easy steps to solve sound problems. We will check cables and software settings. By following these tips, you’ll enjoy perfect sound again. This article is packed with advice…
Seeing a black screen when turning on your device can be frustrating. This issue often occurs due to system errors, forcing the operating system to shut down unexpectedly. Whether it happens during startup, updates, or regular use, the problem disrupts normal functionality. Common causes include hardware conflicts, software glitches, or connection failures. In some cases,…
Computer troubles can be overwhelming. But don’t worry! Our DIY guide will help you tackle common issues. We’ll walk you through essential diagnostic steps and solutions. Knowing your computer’s inner workings is key to fixing problems. Our guide covers slow performance, random crashes, and hardware issues. It offers practical insights for quick computer repair. Computers…
Computer audio problems can be frustrating. About 30% of Windows users face sound issues. A systematic approach helps identify if it’s a hardware or software problem. A silent PC doesn’t always mean a serious issue. In fact, 50% of audio problems are related to simple volume settings. These can be fixed quickly. Windows sound settings…